Monday, 8 April 2013

THE SCIENCE FAIR HAS STARTED TODAY!

 The school's annual science fair has started today. Both primary and secondary students have worked very hard with the help of their teachers to have their experiment's ready for the event. At first, research on their topics, later setting up their experiments and preparing and studying their explanations has all been part of the hard work involved. Here are pictures of the ESO 1 students´ science experiments. More detailed information about each topic will be published shortly. Information of the event will be published on the school's blog.

MEDICINAL PLANTS - By José Luis Benavente

SNAKES - By Eduardo Fernández

FISH - By Rafael Marcos

STEM TUBERS AND EDIBLE ROOTS - By Antonio Rodríguez

WORMS - By Victor Iglesias
PAPER RECYCLING - By Cristina Romero
PROTOZOA - By Alvaro Méndez
ELECTRIC GAMES - By Daniel Barba
AN ELECTRICITY GENERATOR - By Francisco Javier Vila
TURTLES - By Amaya Valdés


Friday, 5 April 2013

SCIENCE FAIR - 2013


Feria de las Ciencias 2013 | Colegio privado bilingüe en Sevilla | EUROPA INTERNATIONAL SCHOOL


La Feria de las Ciencias 2013 tendrá lugar del lunes 8 al jueves 11 de abril. Este último día tendrá lugar la Jornada de Puertas Abiertas a las 17.45h.

Sunday, 10 March 2013

IDENTIFYING THE PARTS OF FLOWERS


 Flowers are the reproductive organ of plants. They carry out sexual reproduction. They have protective parts (calyx and corolla) and reproductive parts (pistil and stamen).
Lilium left to open
The calyx is made up of sepals. Sepals are usually green. The corolla is made up of petals. Petals are usually bright colours and have a strong scent. These characteristics are to attract insects that help carry out pollination. There is a large variety of shapes, sizes and colours of petals.
The stamen is the male part of the flower. Different flowers have different number of stamen. They have 2 parts. The anther and the filament. The anther produces pollen. The pollen grains contain the male sex cells. The filament is a long structure that holds the anther.
The female part of the flower is called pistil. The pistil is in the centre of the flower and is bottle shaped. The top part is called stigma and it is sticky. This is where the pollen grains stick after pollination. The long part is called the style and the bottom part is the ovary. The ovary contains the female sex cells. The shape of the pistil and stamen vary in different flowers. By observing flowers you can sometimes tell whether they are pollinated by the wind or by insects. Flowers that have very long stamen that hang out of the flower are usually pollinated by the wind. Flowers that have the stamen and pistil hidden inside the structure of the flower are pollinated by insects also flowers that have bright colours and strong scents.

We have identified the parts of flowers. For this experiment we have used lilium. Lilium are very big flowers, you can see the stamen and pistil very clearly.

We have observed the flower using a hand lens. We counted the sepals, petals, stamen and filament, also the anther, filament, stigma, style and ovary.
We touched the stigma and noticed it was sticky and touched the anther and saw how the pollen grains stuck to our finger.

After in our notebooks we wrote all the information collected in the experiment and drew a scientific diagram of the flower.
By Rodrigo Contreras - E1C
We also looked at compound flowers. If you look at a daisy, at first, you cannot see any of the parts we have studied. This is because daisies are not only one flower, in fact, they are made up of hundreds of flowers.

We opened up daisies and took a close look at each of the components. Each one is a flower, it has petals, stamen and/or pistil. Each white petal is also a flower. If you look very carefully you can see the pistil.

Students were very surprised to see that each of the components of a daisy is a flower.


Monday, 4 March 2013

PLANT MOVEMENTS - TROPISM

 Plants don't move like animals but they do respond to certain stimuli, making them change their direction of growth. These plant movements are called tropisms. Plants can grow towards a stimulus (positive tropism) or away from a stimulus (negative tropism). Depending on the nature of the stimulus there are different types of tropism: 
  Phototropism, the stimulus is light
  Geotropism. the stimulus is the Earth or gravity 
  Hydrotropism, the stimulus is water
  Thigmotropism, the stimulus is contact

We put some filter paper in glass jars. We placed lentils between the paper and the glass. We added some water and waited for the seeds to germinate.


 At first the stems grow upwards, this is phototropism or heliotropism and the roots grow downwards because of geotropism. We then placed the jar horizontally. We considered two posiibilities or hypothesis. The stems and roots would continue growing in the same direction but horizontally or they would now change direction and continue growing upwards towards the Sun and downwards affected by gravity. 
After only 1 day this is what we saw. The roots were clearly being pulled down by gravity, that is, geotropism and the stems were clearly bending up towards the Sun, that is heliotropims.
After more days, tropism was more evident. You can clearly see how plants respond to stimuli and produce permanent changes in the direction of their growth in response to them.


OTHER TROPISM EXPERIMENTS

Previous years I have done other experiments related to tropism. In the following photographs you can see the results.

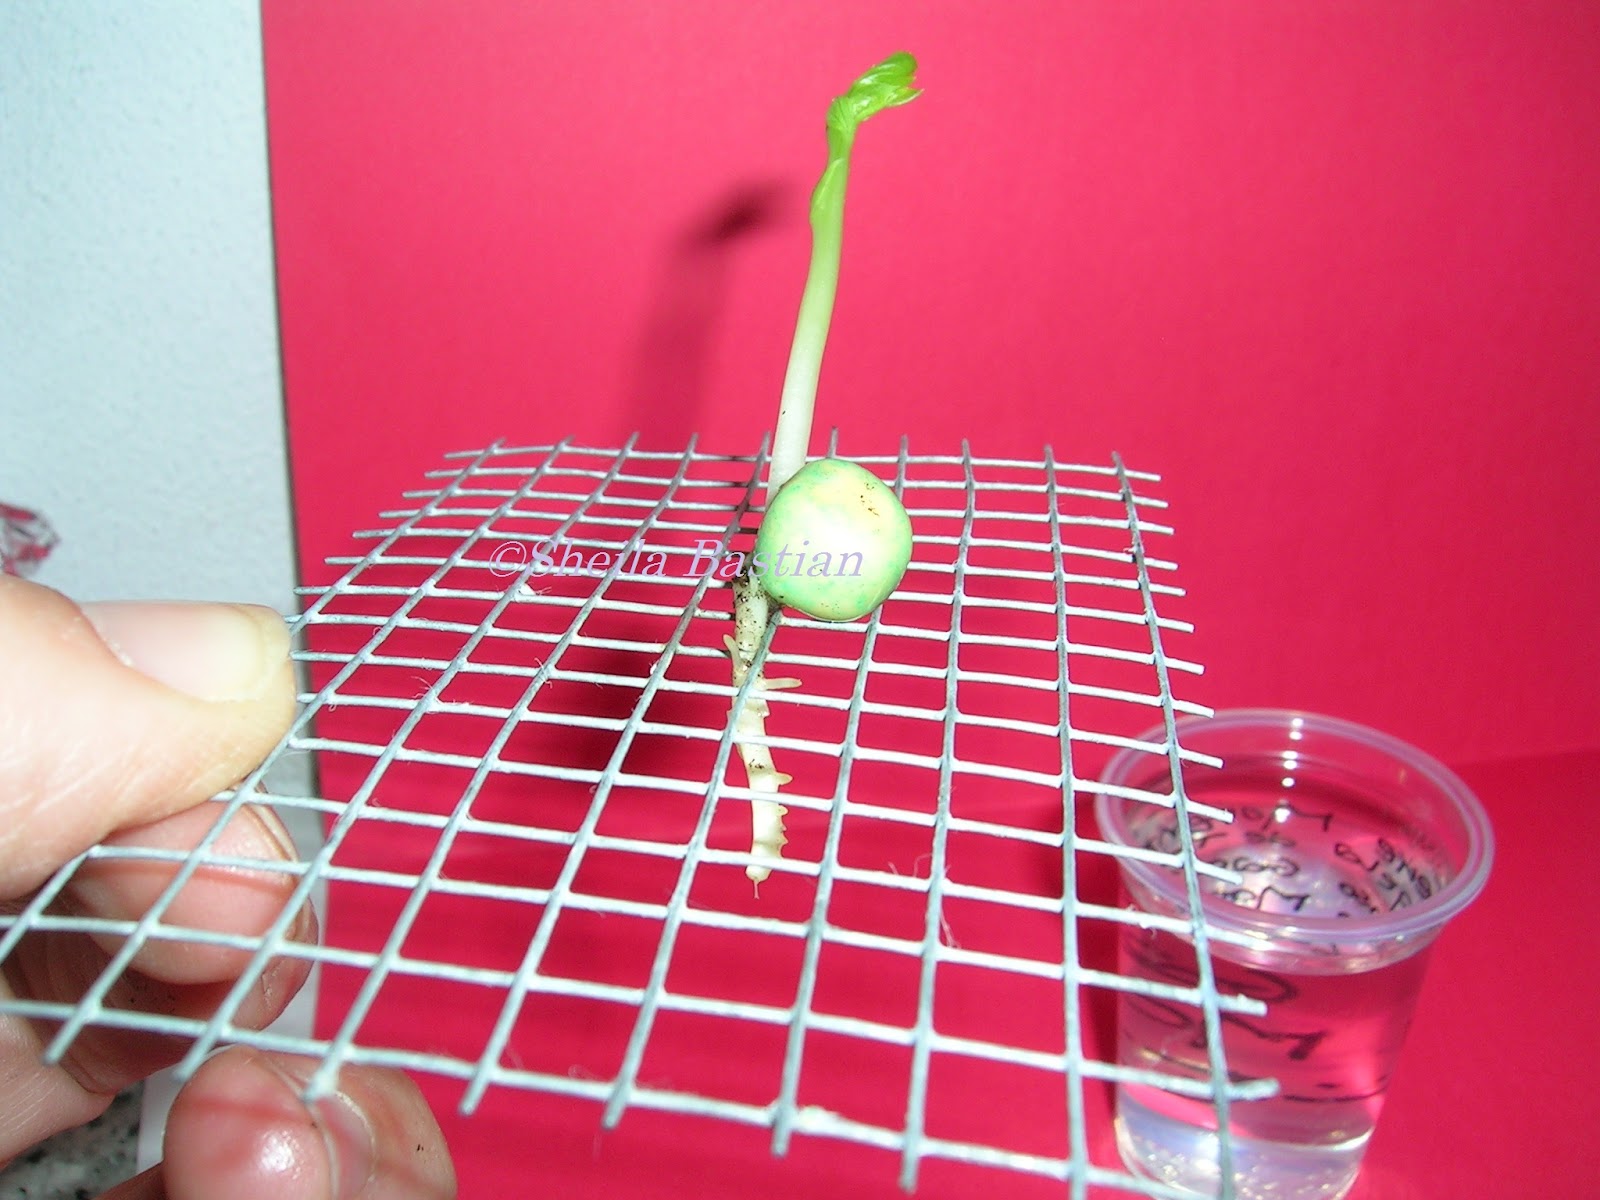
In this one we germinated pea seeds. 


 Once the seedling had grown we put it in a box with an opening for light on one side.

 After some time you can clearly see how the stem has bent and grown towards the light. This is an example of phototropism.


 In this other experiment, we planted grass seeds in a tray and put them in a box, in which we had previously opened a hole on one side.


We put the box in a sunny place and watered it often. After some time the grass began to grow. This is what happened.


The grass has grown towards the light. This is also phototropism.

In this last experiment we hung a plant upside down for a long time. We carefully kept the soil moist by frequently spraying it with water. After some time, in this case, a couple of months, we could see how the stem began to bend upwards. Stems are affected by positive heliotropism, that is they grow towards the Sun or negative geotropism, that is they grow in the opposite direction to gravity.


Saturday, 2 February 2013

STUDYING THE ANATOMY OF A FISH

 Fish are aquatic vertebrates. They live in fresh or salt water. They are cold-blooded, that is, they cannot regulate their body temperature. They breathe through gills. They reproduce sexually. Fertilisation takes place externally. They are oviparous, however sharks are ovoviviparous, and fertilisation is internal. There are two goups of fish: cartilaginous, such as rays or sharks and bony, such as carp, salmon, sea bass, trout etc.
 We have studied the external anatomy of a fish. We have had the opportunity to take a close look at some of the parts of the fish that we studied beforehand. The fish we used for the experiment were sea bass. We placed the fish on plastic trays and we used tweezers and magnifying glasses. We have also learnt how to do a scientific diagram, which is a clearly labelled picture.

 First we observed the fusiform body of the fish, that is wider in the middle than at the ends.

A sea bass
 Fish limbs are called fins. With the tweezers we opened and looked at the shape of the fins. We saw that the fins are made up of spines and skin.

Dorsal fin..
 Fish can have upto three dorsal fins. We saw that sea bass have two.
Pelvic fin. 

Anal fin

Caudal fin

Lateral fin
 With the tweezers we felt the operculum and noticed that it is made up of hard tissue. It protects the gills. (Sharks and rays have no operculum).
Behind the operculum we saw the gills. The gills are the respiratory organ. They are used to extract oygen from the water and release carbon dioxide. We noticed that the gills are made of  highly folded tissue and are full of blood, covered with a very thin layer of tissue. We could tell because of the red colour of the gills. Both characteristics are typical of respiratory organs, the folded tissue increases the surface area so more oxygen can be trapped and the thin tissue helps the oxygen penetrate easily into the blood.
Gill

We put the tweezers in through the gills to see how they are connected to the mouth. Fish take in water through the mouth and it goes out through the gills. As it passes the blood traps the oxygen from the water.

We opened the mouth to see the tongue and the tiny teeth.


We also observed the scales and the lateral line. The lateral line is a sensory organ, it is full of receptors that detect vibrations.


Here are some great scientific diagrams of the fish we studied.

By Rodrigo Contreras - E1C
By Cristina Romero - E1B

By Elena Pérez - E1B

By Inaki Antequera - E1C
By Ana Ortiz - E1C
By María Muñoz - E1C
By Juan de Agustín - E1B
By  Julia Compañó - E1D
By Carmen González - E1D
By Alejandra Sánchez - E1D  

Did you enjoy this experiment? Leave your comment!